Add Files
Use Mobile Access Management to add files directly into certain apps. This feature is available on request from Imprivata Support.
Only apps which support iTunes file sharing may receive files. You can check your apps by opening iTunes, selecting the device, then clicking on the File Sharing section.
Click to enlarge

iTunes is also helpful so you can understand the file structure expected by an app. Apps will require a very specific file structure to function. If you have questions about file structure, consult the app developer.
Step 1: Prepare your Documents
Zip your documents before uploading them to Mobile Access Management. Mobile Access Management will automatically unzip the documents when installing to the device.
Imprivata has tested documents sized in excess of 2 GB.
Step 2: Add the "Add Files" Action to your Workflow
-
Navigate to the Apps submenu and select Add Files.
Click to enlarge
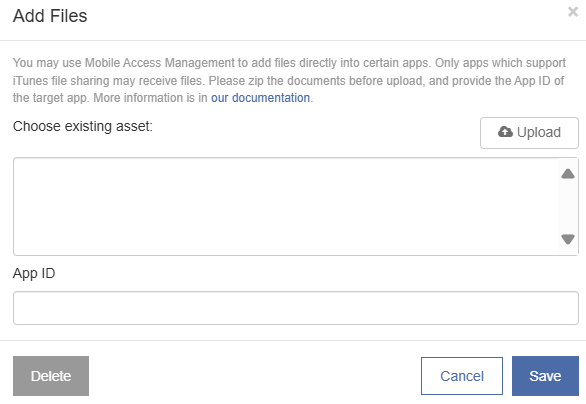
The dialog lists any files you’ve already uploaded. If needed, add a new zipped set of files to Mobile Access Management by clicking Upload.
-
Specify the App ID of the targeted app.
-
You can add multiple Add Files actions to a single Workflow. This allows you to target several apps.
Step 3: Deploy to Your Devices
When deploying to devices, each Launchpad will download the files to a local asset cache. The local copy will be used for all devices, as long as the copy on the server is unchanged.
By default, the Launchpads will always copy the files to devices, even if they already exist.
Updating the Files
If you need to update your content, you may easily do that without modifying the Workflow.
-
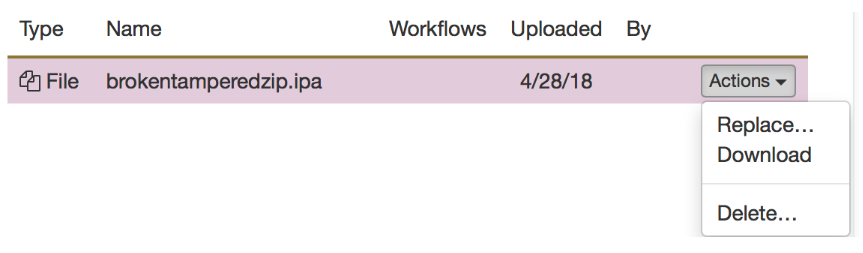
Use the Mobile Access Management Assets tab to list all assets.
-
Click on the file you wish to update.
-
Select Replace... from the menu.
Click to enlarge
The updated assets will be immediately available for Launchpads to download and re-cache with no additional steps.